
Objective: Below is a video with the updated Terminal Dashboard in action. This video will show you how to view Terminal Nominations and see what has been completed and view their active movements
Audience: Shippers at Terminals
Below is a video and article that shows you how to use the Terminal Dashboard
Terminal Dashboard
The purpose of this article is to introduce you to the new Terminal Dashboard. We have upgraded the Terminal Dashboard to make it faster and easier to use. The new Terminal Dashboard has been improved to give the user an easier customizable layout and a cleaner look and feel. The improved dashboard will enable users to quickly see their data without the page feeling sluggish.
Below are some of the new features of the Terminal Dashboard:
- Standard Core upgrades
- Selectable columns
- Movable columns
- Re-designed the Order by “Drag’n Drop”
- Batches
- SCDs
- Intuitive Group/Ungrouping
- Disconnected all connections to the drawer
- Moved Elements into the search form
- Location
- Company
- Product Type
Terminal Dashboard
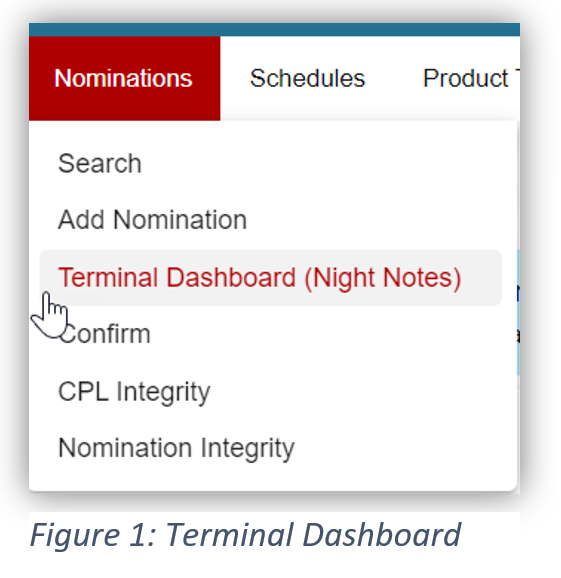
We have eliminated all the large boxes and configured the page to look like the Nomination, Schedules & Tickets search pages. (See Figure 1)
Access the Terminal Dashboard by hovering over “Nominations” and selecting “Terminal Dashboard”.
How to Use Filters
Upon initial access to the page this will be the view until you customize your filter selections. The SCD refers to the type of movement for Terminal Nominations. For example: Inbound Pipeline, Outbound Pipeline, etc.
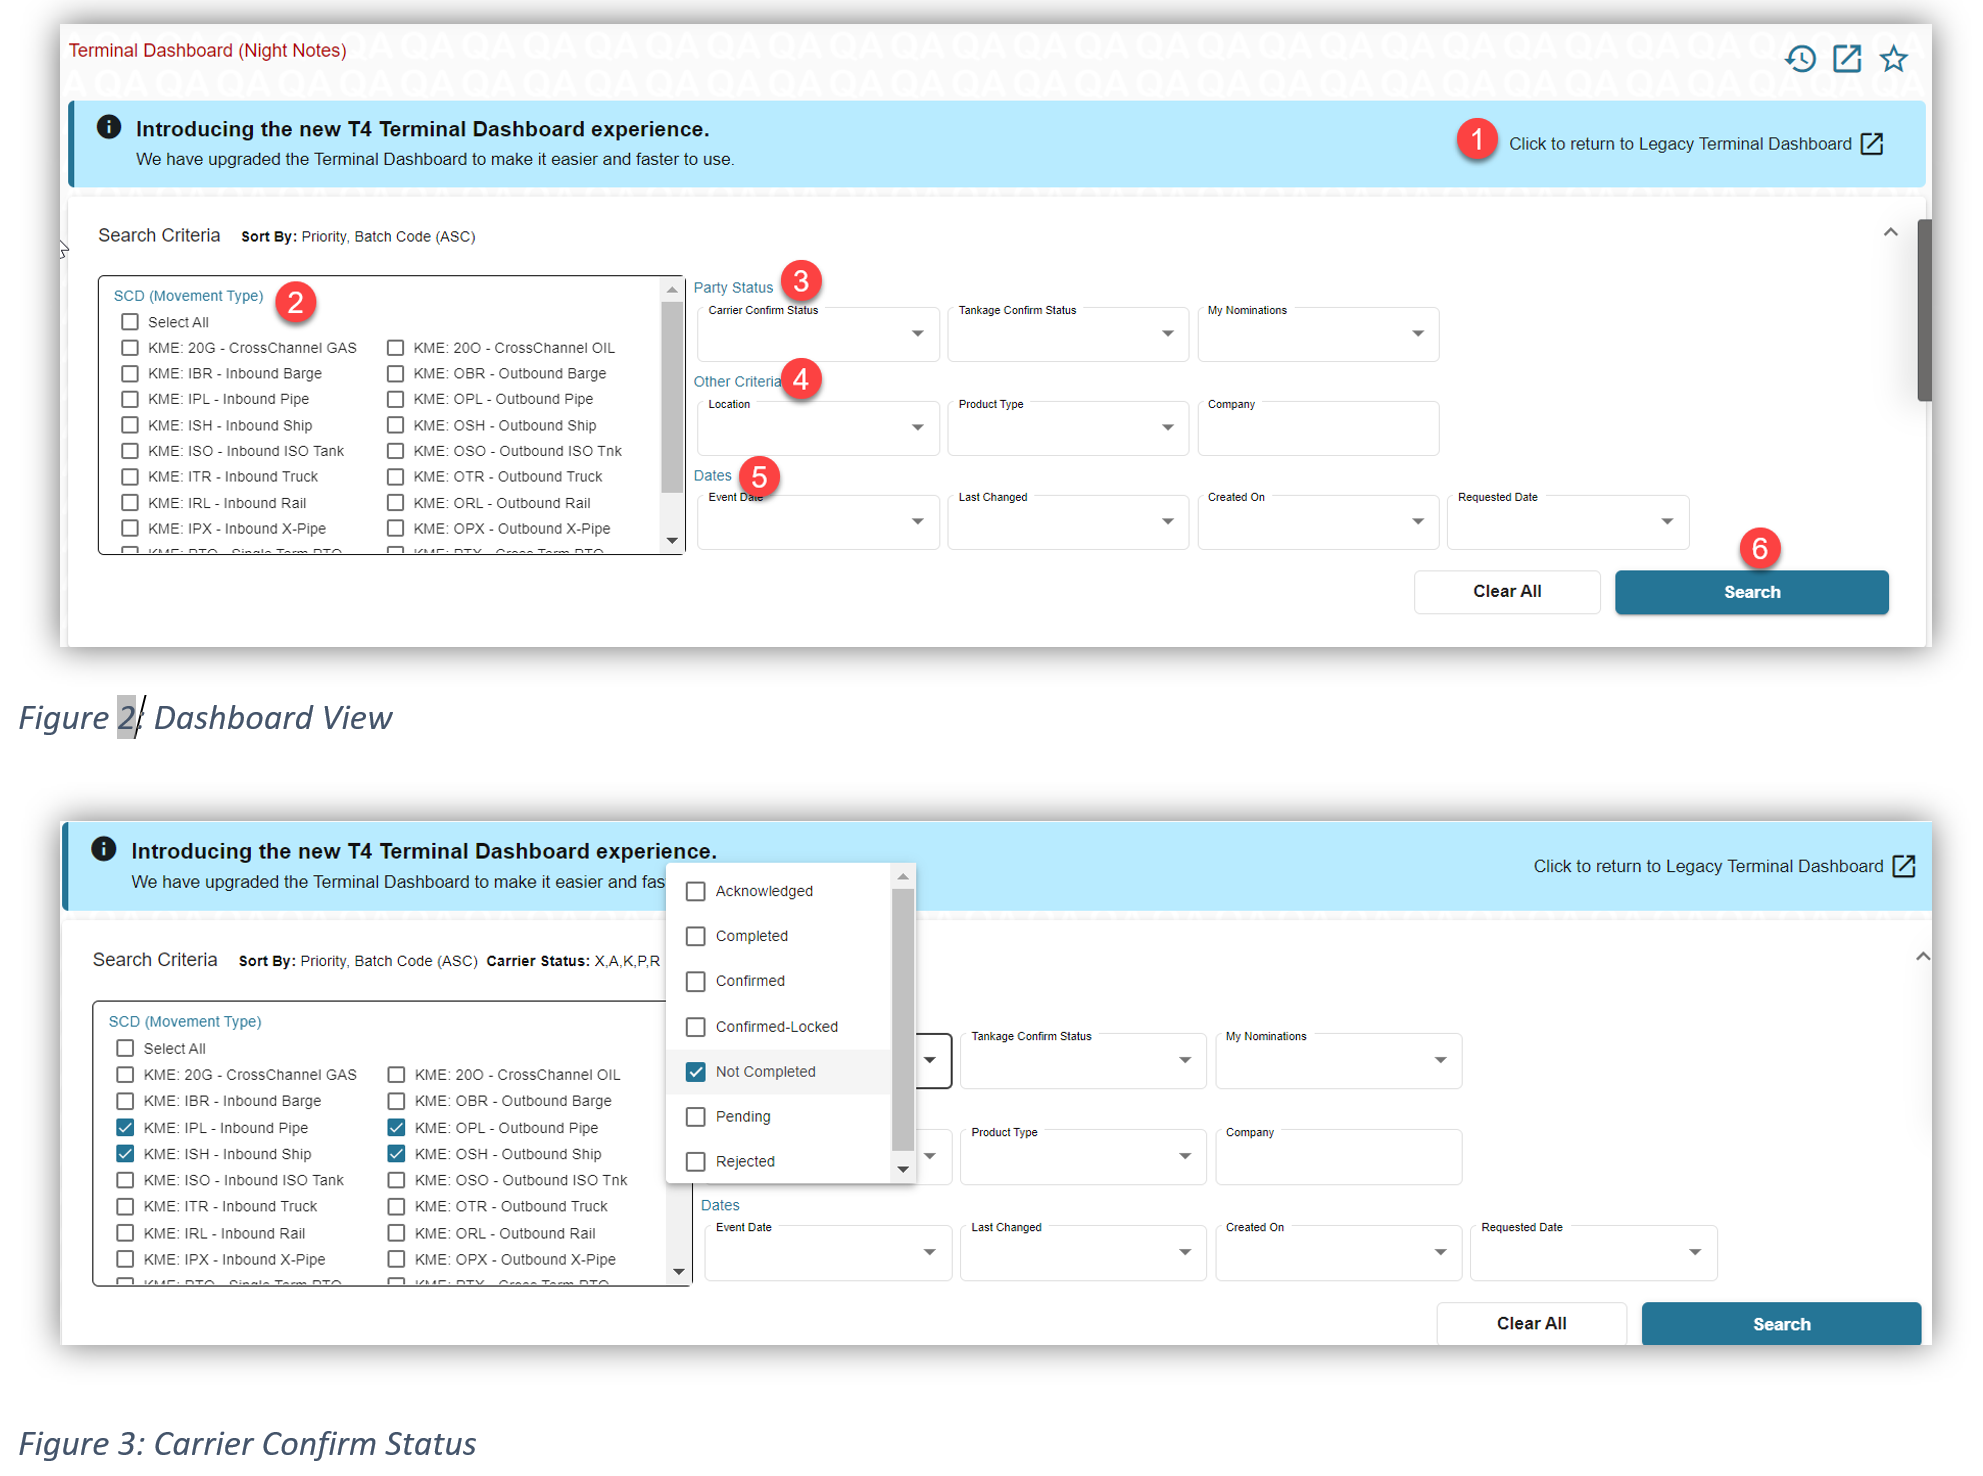
- Click to return to the Legacy Terminal Dashboard. Please note: this page will eventually be deleted.
- Click to select the desired SCD(s) or “Select All”
- Select the Party Status from the drop-down filters. Please note: the “My Nomination” filter only show your nominations, or the nominations associated with your shipper code. A Carrier Confirm Status of “Not Completed” will show you movements that have not happened yet. See Figure 3.
- “Other Criteria” allows you to filter your results further by selecting Location, Product Type or Company.
- Each filter in the “Dates” selection allows you to specify a time frame in the drop-down menu.
- Once you have completed all requested filters, click “Search”.
Hint: Click anywhere in the white bar of the Search Criteria view to expand or collapse the window.
Please Note: on the list of enchantments, we added the batch and event counts plus we moved the Terminal, Product Types, and Company out of the drawer and into the page. The page now does NOT interact with the drawer.
Filter Selections
Select the desired SCDs (movement type) or Select All. You can narrow your results using the filter drop down options. Once you complete this set up it is static and will remain the same when you log in and out. You will also see three (3) new options when your results are returned.
- Refresh
- Group/Ungroup
- SCD Drag ‘N’ Drop
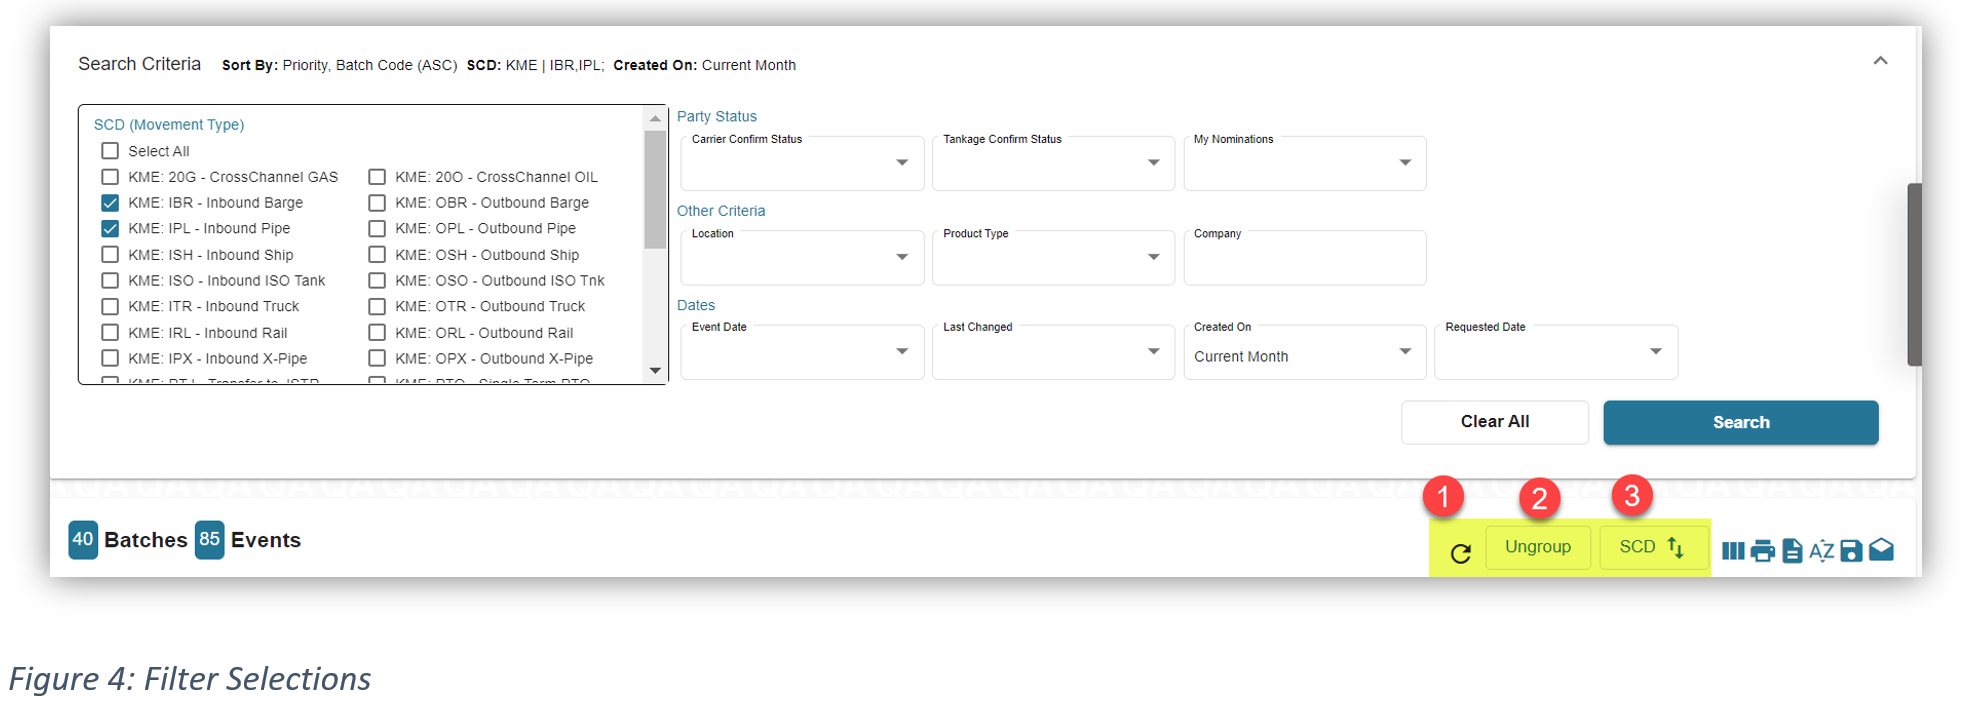
1. Refresh
Click to refresh your page.
2. Group/Ungroup
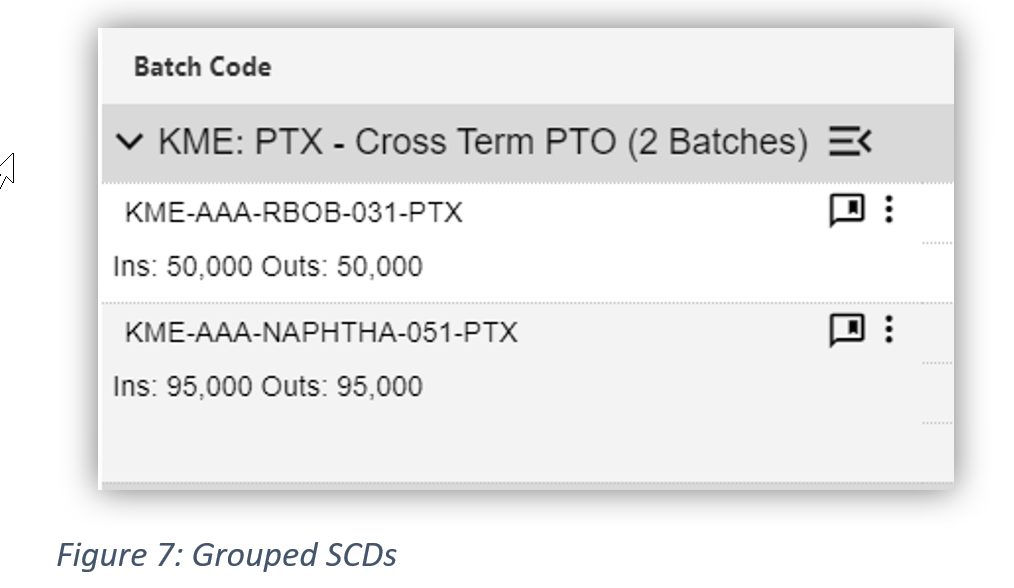
You now have the flexibility to group and ungroup your SCDs. Group view allows you to see the batches of the same SCD. A grey header appears to differentiate the results within the grid. When you “Ungroup” your selection the results are now categorized by batch code instead of SCD.
3. SCD
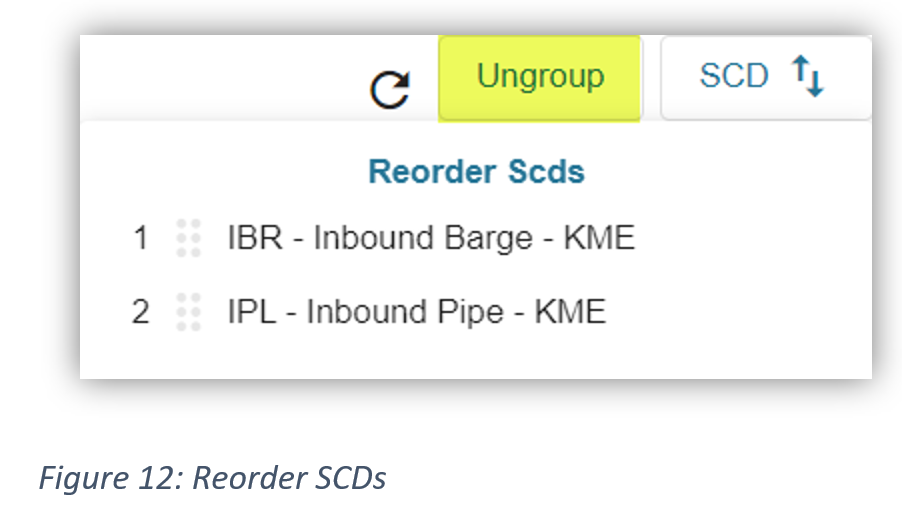
Clicking “SCD” gives you the option to prioritize your SCDs or reorder them.
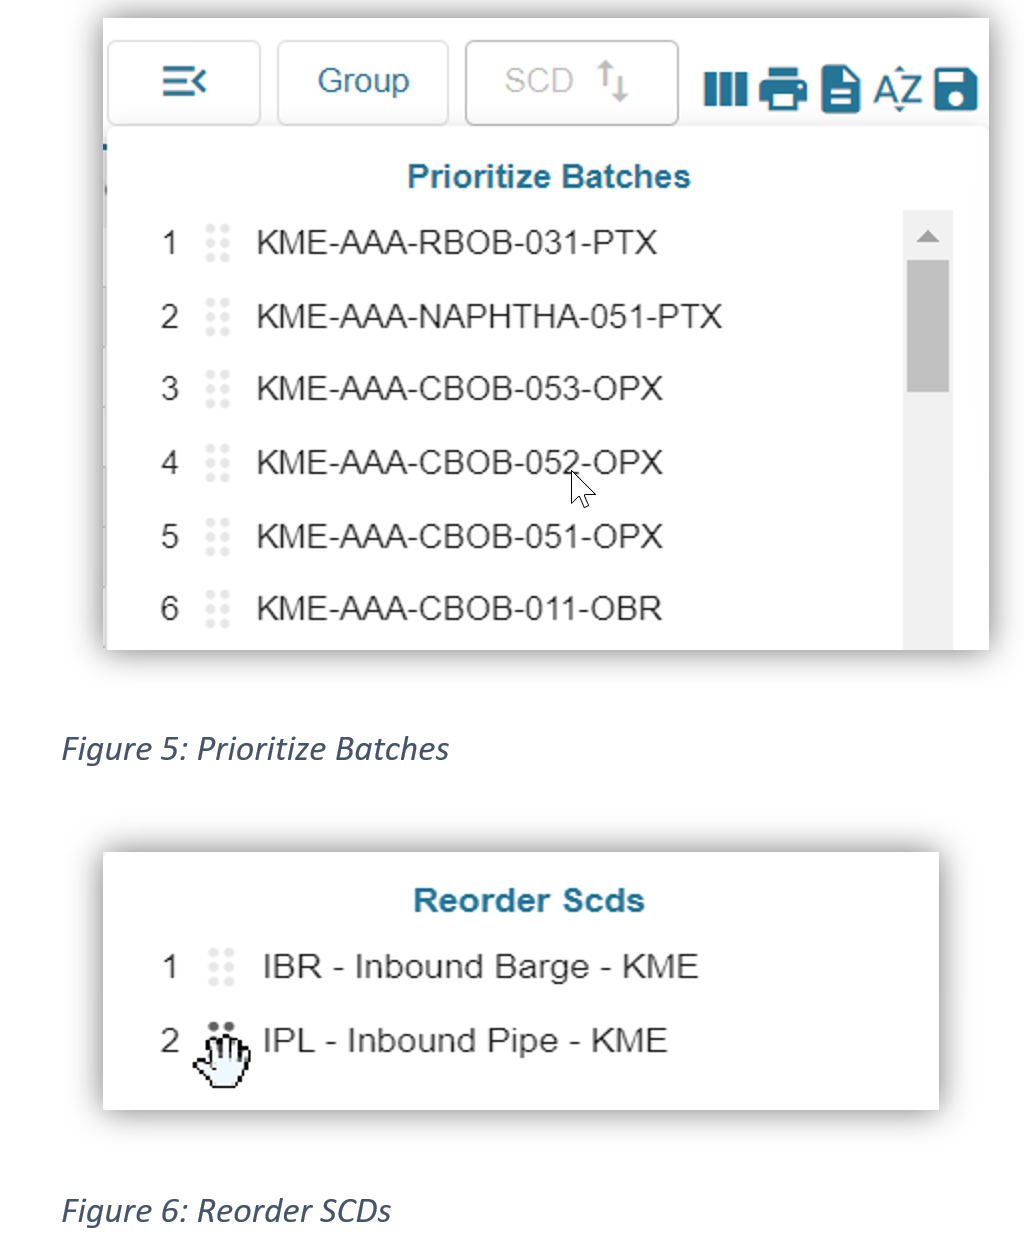
To reorder the SCDs, click on the 6 dots and use the hand to drag the SCD to the desired line up. When you move the SCD, it will adjust the order in the list.
Clicking the down arrow minimizes your SCDs
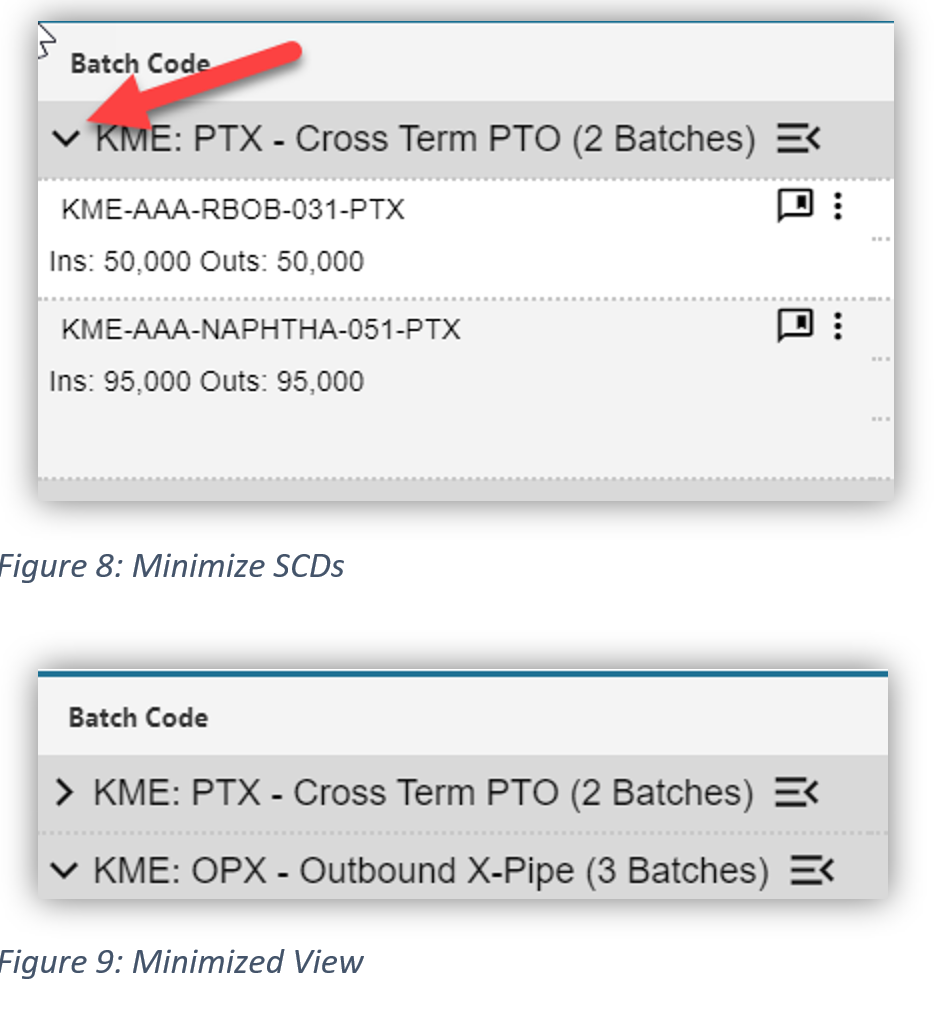
Click to order the SCDs
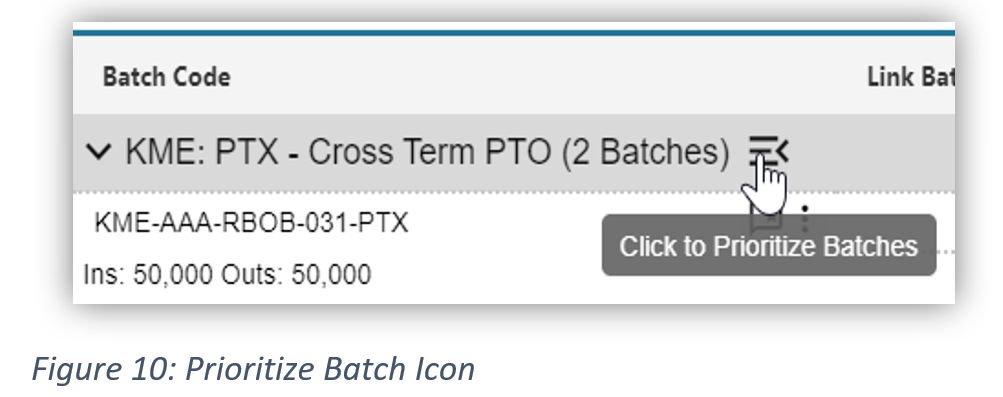
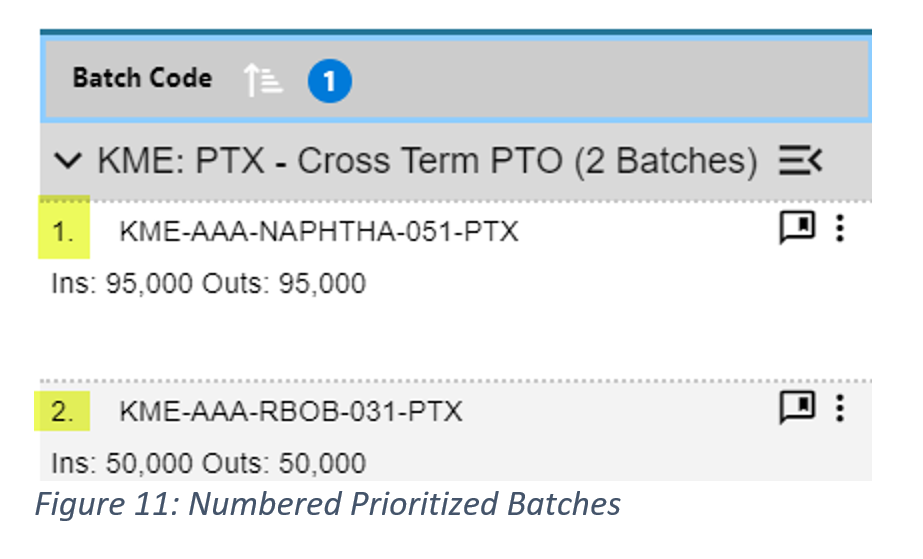
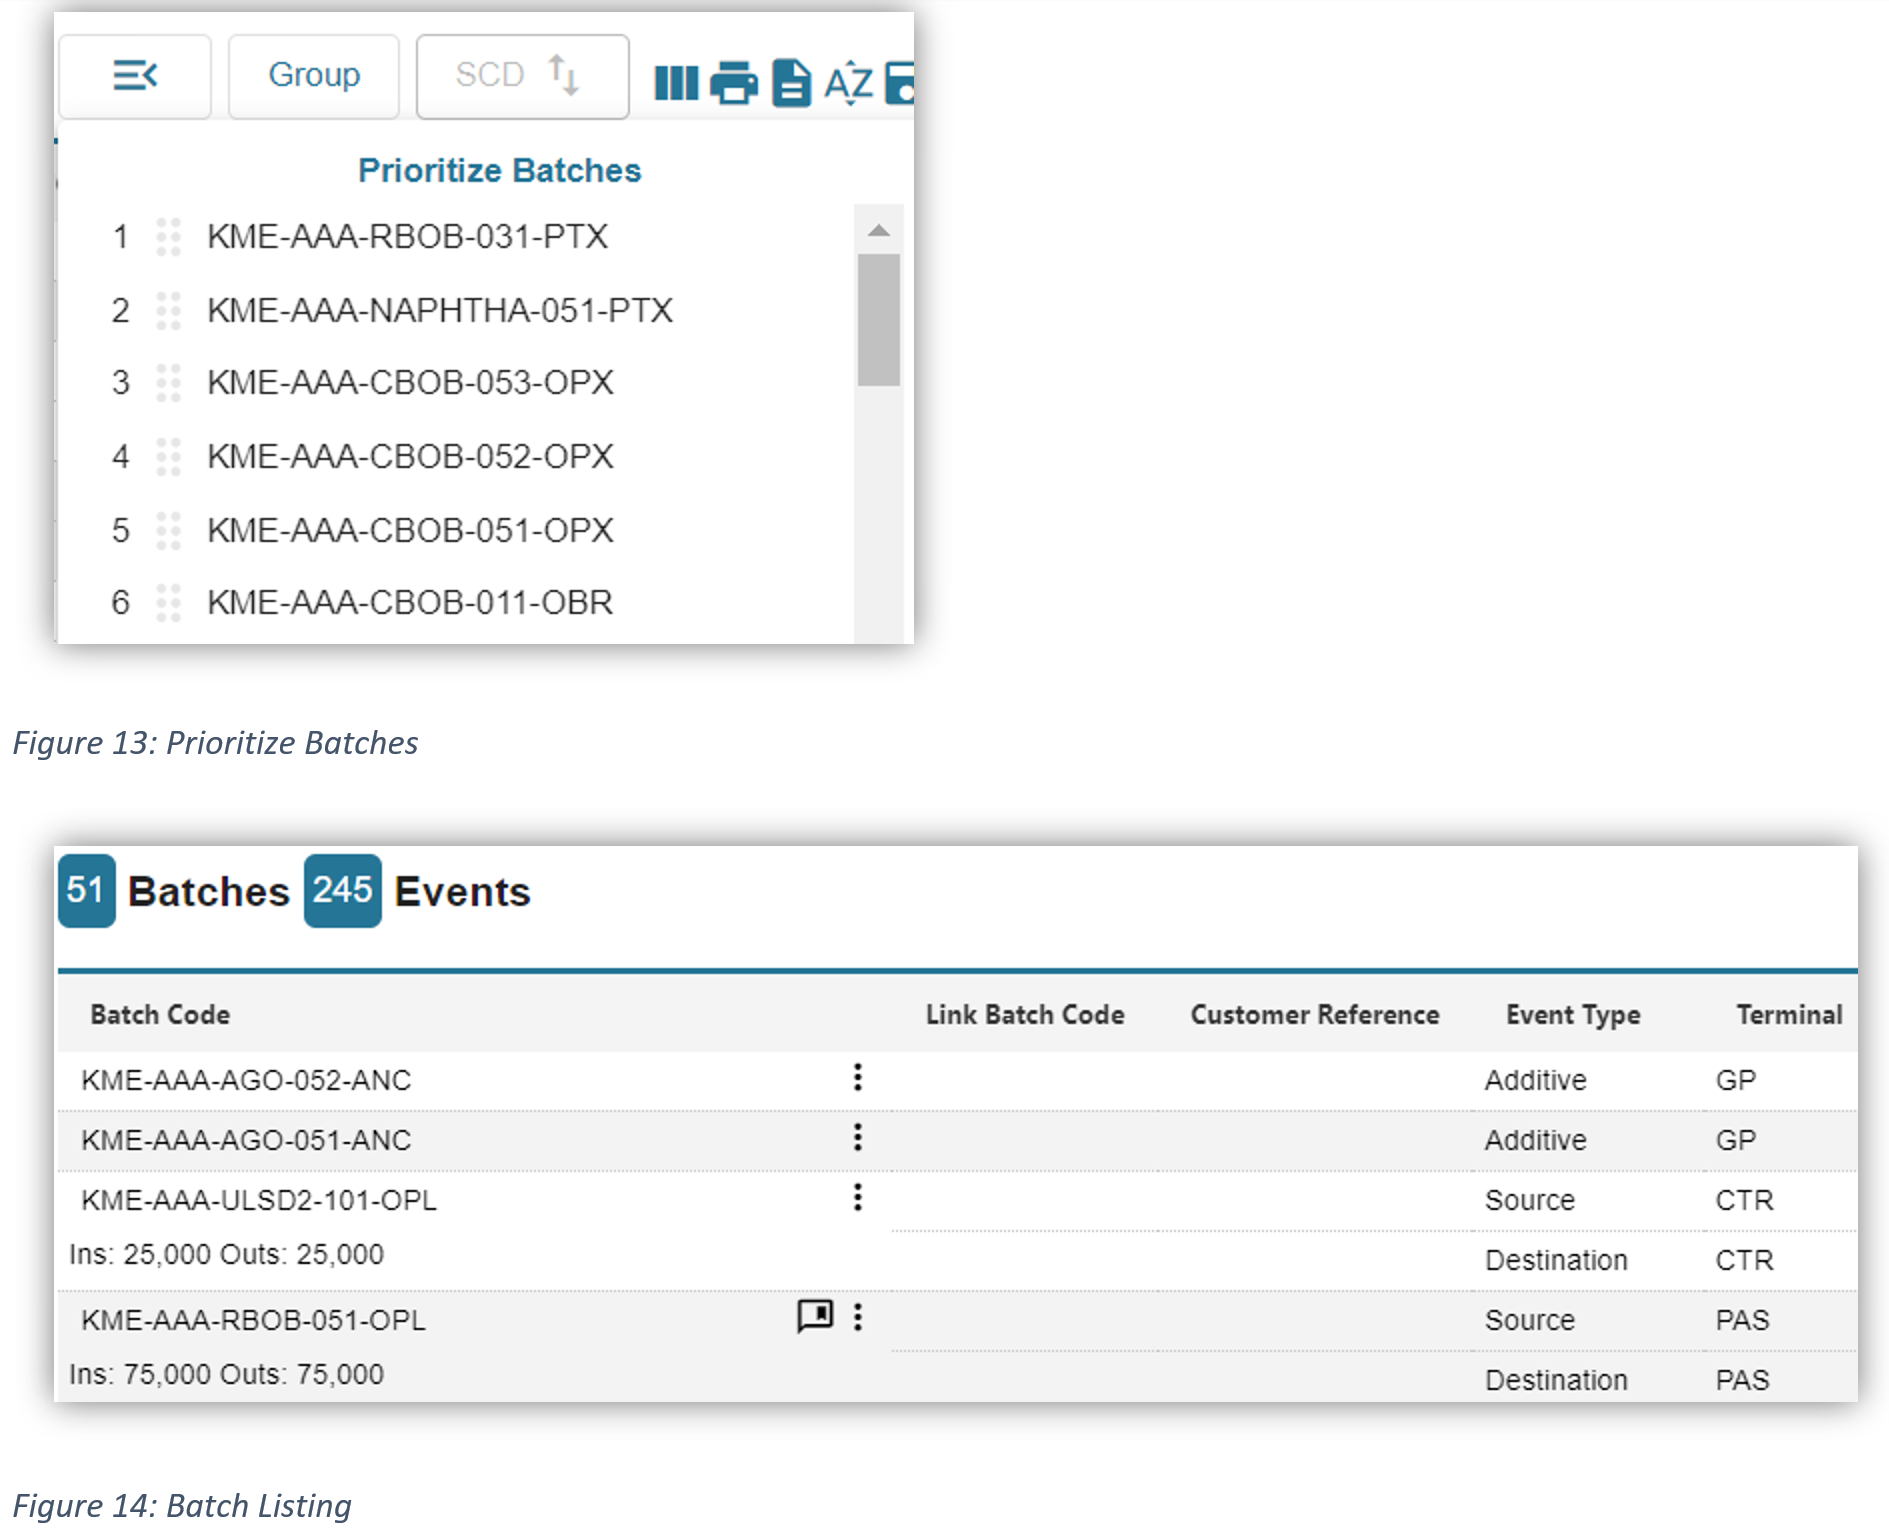
Use the Drag- N-Drop feature by clicking on the 6 dots to reorder your batches. Once you prioritize the batches they will be numbered in order of priority. The order is specific to your account.
Ungroup
Selecting “Ungroup” will uncategorized the batches by SCD. Instead, they will be viewed by the priority you determine.
The functionality is the same as you can reorder and prioritize your batches.
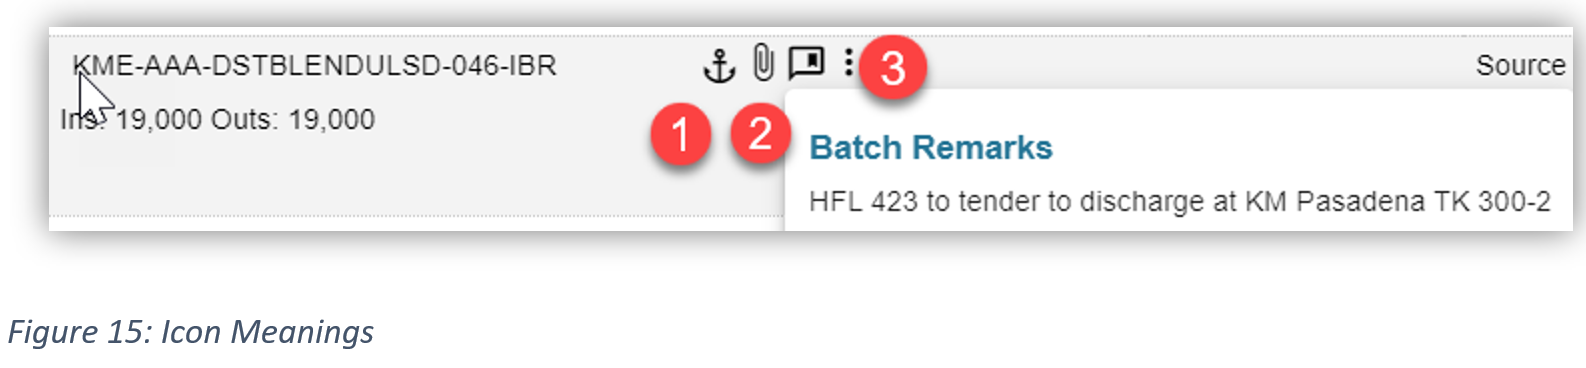
The following icons are sometimes located next to the batch code.
- Ready to Dock
- Attachment
- Batch Remarks
Customizing Columns
Columns can now be customized on the Terminal Dashboard page the same way they are configured on the Nom, Schedules & Ticket Pages.
Click on the 3 vertical lines (highlighted) to add/remove columns and drag/drop to move columns.
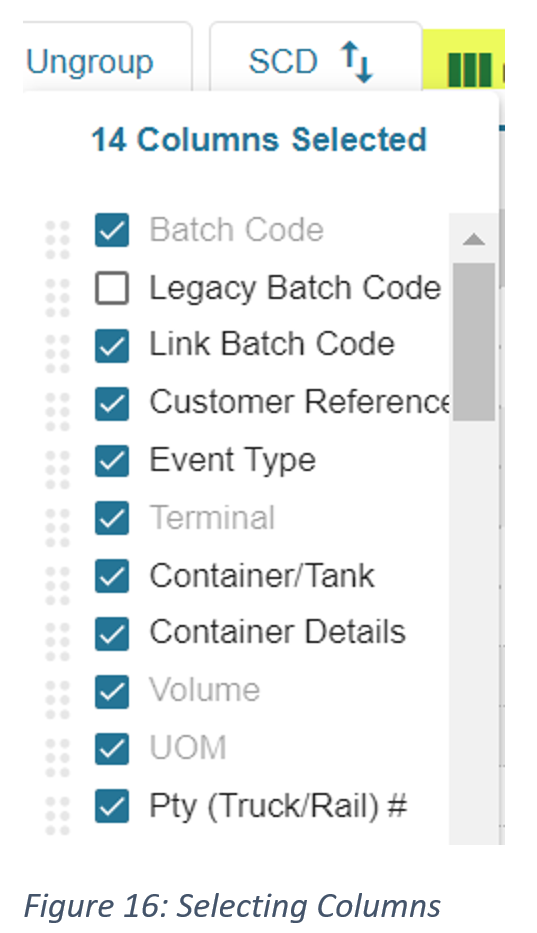
Column headers in gray are not de-selectable; they are a required element of the data. All of the other column headers can be selected/deselected based you your desired view. The columns can be moved by clicking the 6 dots and dragging the selected column to the desired location in the results.
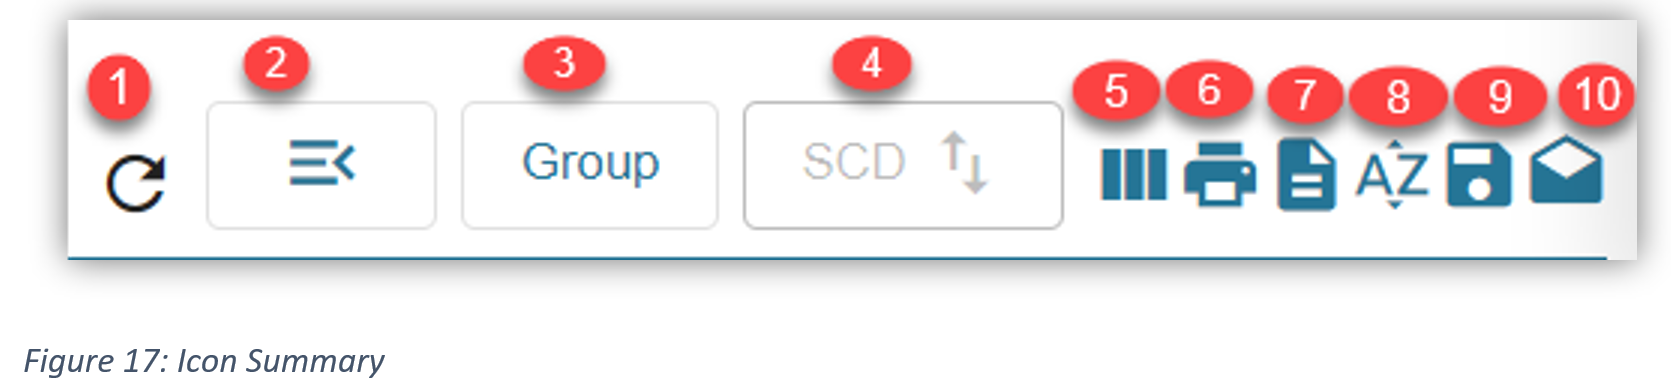
Icon Summary:
- Refreshes the page
- Click to prioritize batches
- Group or ungroup the batch view
- Reorder the SCDs
- Column Selection
- Export to CSV
- Sort results by multiple columns
- Save
- Push Options
To view the new Terminal Dashboard in action, please click here to watch the video. https://transport4.zendesk.com/hc/en-us/articles/6317142667923
Comments
0 comments
Please sign in to leave a comment.