
What is a PTO
A Product Transfer Order (PTO) allows a shipper to sell a product and transfer both ownership and control of the product while still in the carrier's custody. PTOs allow shippers to earn line space on unallocated segments, ship downstream of allocated segments, and control the destination of their products without the knowledge of their competitors.
The PTO Process
Use the Product Transfer Order Menu to kick off the process:
1. The Sellers Nomination MUST EXIST prior to a PTO
2. Shipper Action - Seller or Buyer can add a new PTO (or Copy and existing PTO)
3. The Shipper may change their Nomination at this time
4. Shipper Action - Counterparty (typically the buyer) will update & confirm the PTO
5. Shipper Action - Counterparty should add or change a Nomination
- The PTO volume should be converted to barrels per day for the Nom
6. Carrier Action - Once both parties have confirmed the PTO, P66 will confirm the transfer IF both parties have updated their Nominations
7. Gray Oak will invoice for the PTO
Why PTO's
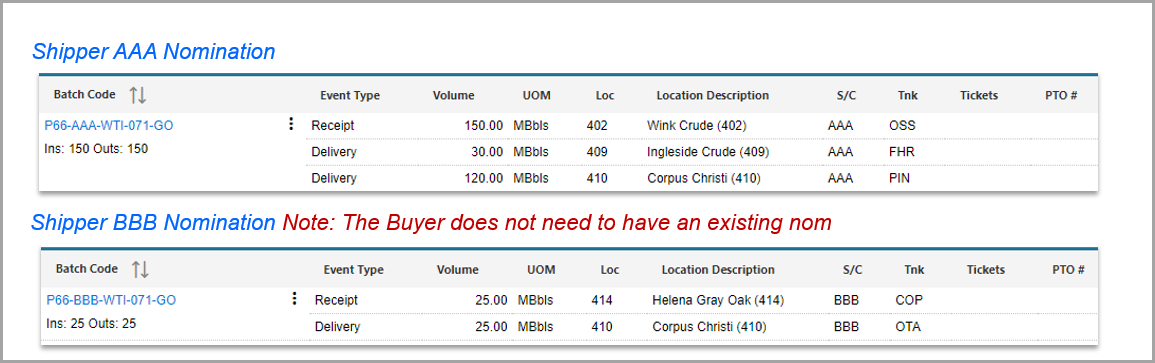
In the below example, Shipper AAA and BBB both have Nominations on GO, Company BBB would like to buy 5,000 barrels from AAA. Please note that the buyer does not need to have an existing nom.
Adding a PTO
Either the Seller or Buyer can enter the PTO (normally it is the seller)
To Add a PTO, please hover over the Product Transfer Order header and select Add PTO:

Once on the Add PTO Screen, there will be (5) separate areas to fill in:
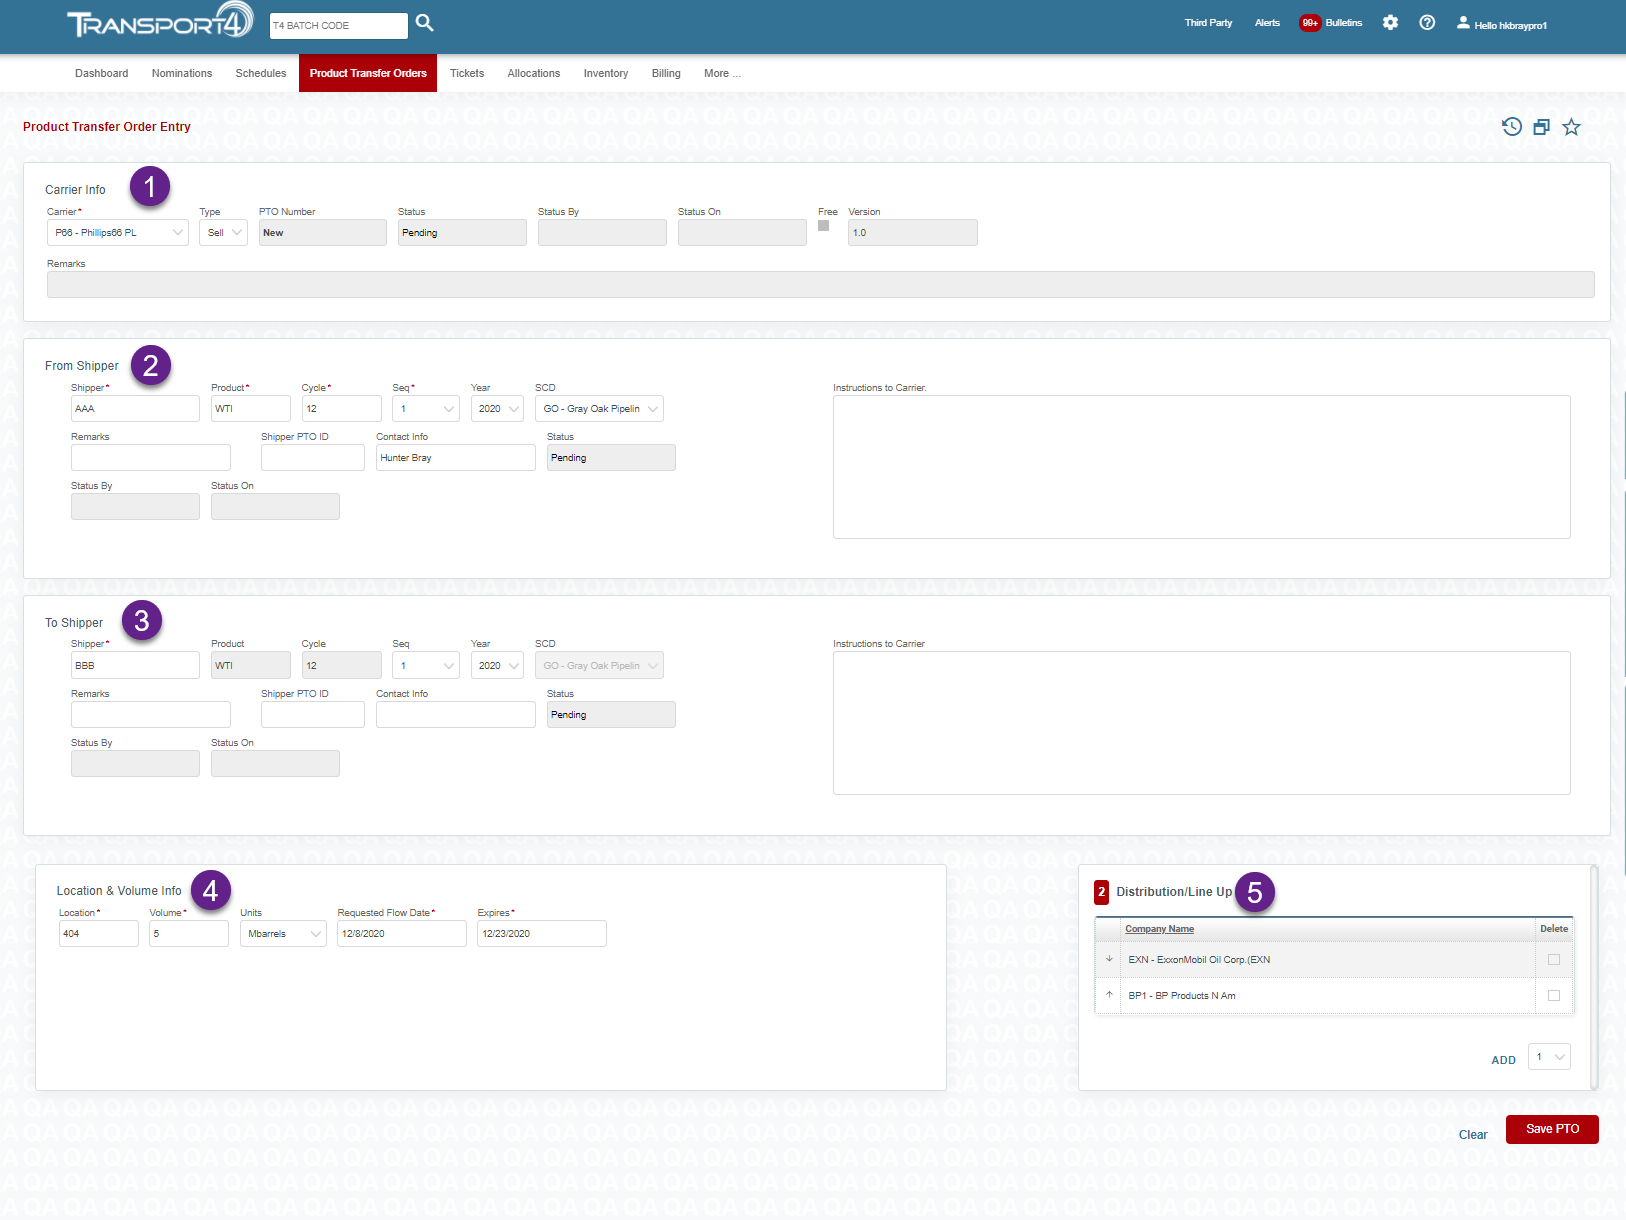
1. Select the Carrier and Type (Sell or Buy)

a. Select the appropriate Carrier
b. If Buyer, change to Buy
2. Seller enters their company code and batch information they are selling the barrels from

a. Select the From shipper
3. Enter the Buyers company code

a. Select the shipper
b. Select appropriate cycle
4. Provide Location, Volume and changes to the expiration date
- If the PTO is not confirmed by the Buyer and Carrier by this date, it will expire
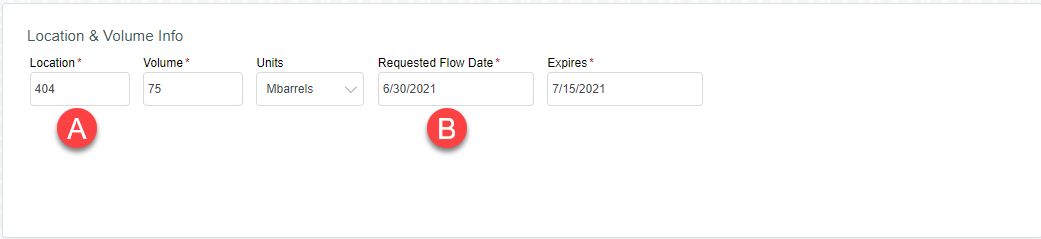
a. Select correct Location
b. The volume will be Transaction Volume, not barrels per day
c. Select Request Flow Date
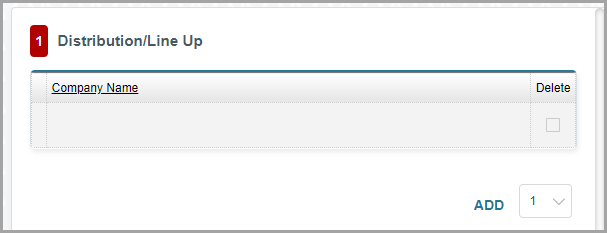
5. Add any trading partners. They will be granted access to the PTO & PTO event on the Nomination
After saving the PTO, the user will be prompted to create/change the Nomination
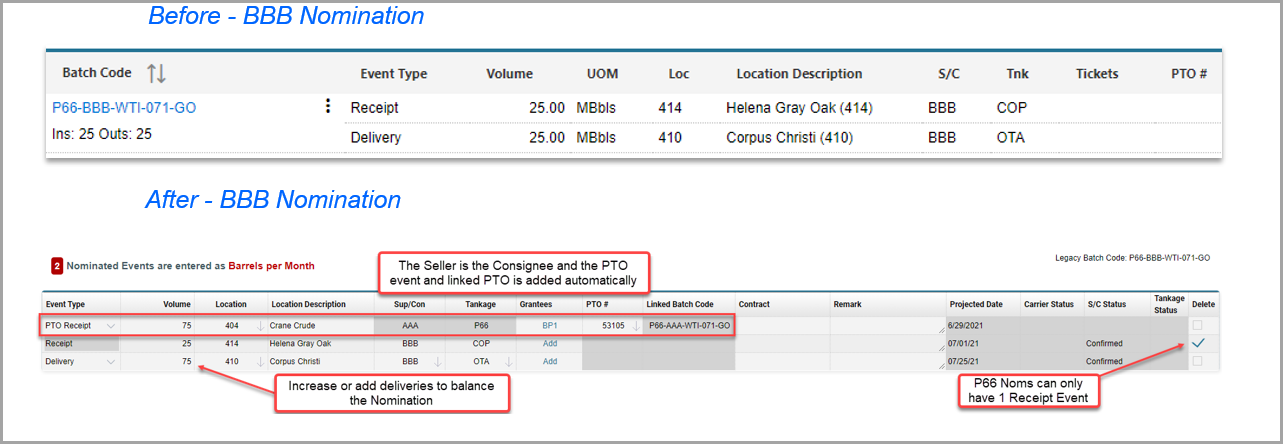
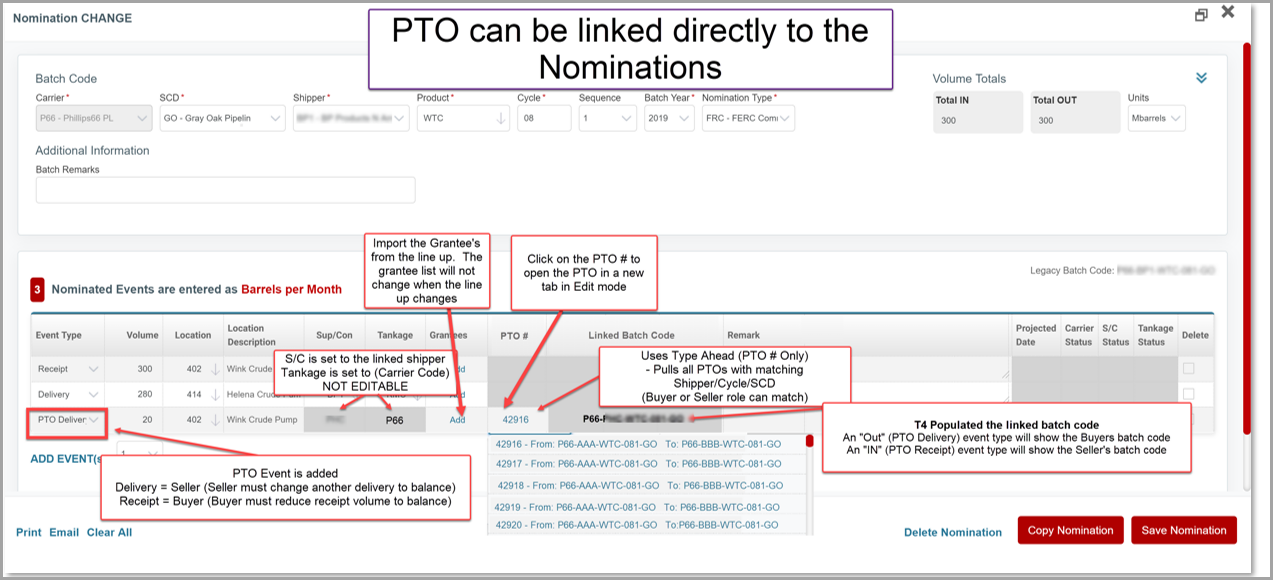
Changing the Nomination (Seller)
Once the PTO is saved, the Seller will add a "PTO Delivery" event and reduce another delivery to balance the nomination.
Alerts Page
An Alert is issued once the Seller creates the PTO. The Buyer will then be able to Confirm or Reject the PTO from the Alerts or Confirm page. A user can set up an Alert Push to receive notifications by email if needed.
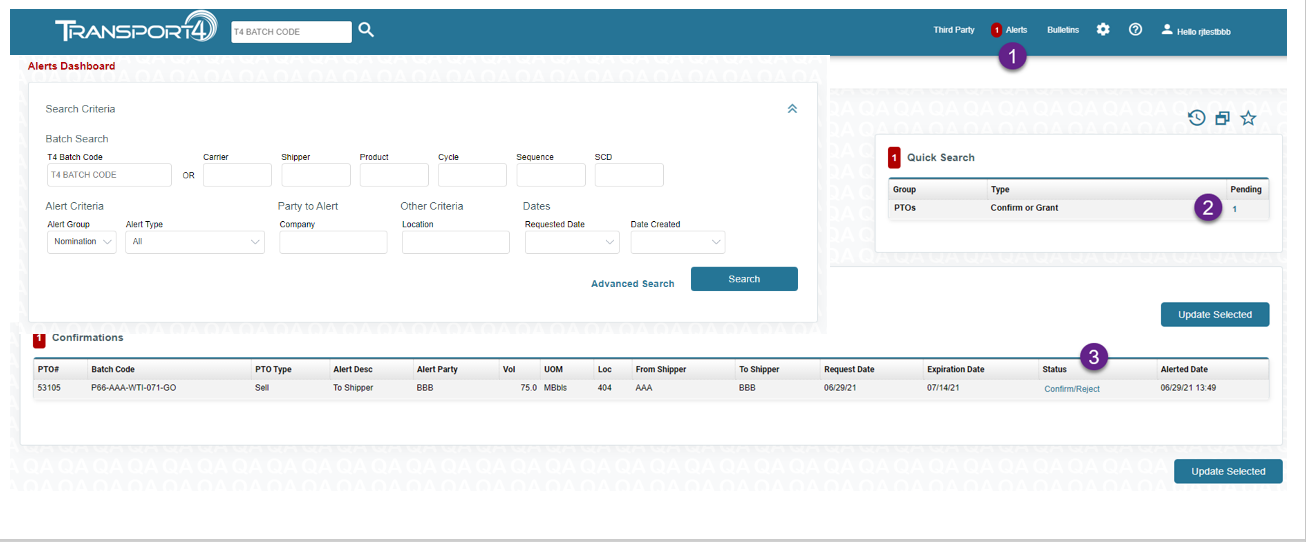
1. Select Alerts Page at the top right of the screen.
2. Pending will show how many PTO's you have pending at that given time.
3. Confirm/Reject allows you to perform either function directly from this screen.
- The Buyer can Confirm/Reject from the alert
- Set up an alert push to receive Notification by email
- The Buyer can change "To Shipper" information
Confirm Page

Users can Reject or Confirm a PTO from the "Confirm" Menu option. Users can also manage the PTO using the context menu.
After Confirming, the Buyer is prompted to add or change the Nomination.
Changing/Adding the Nomination (Buyer)
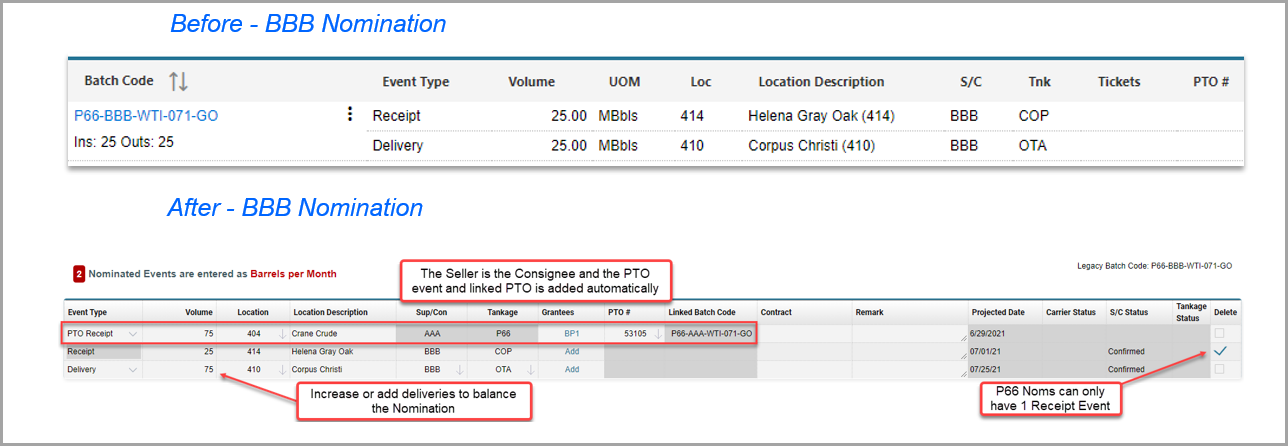
The Buyer will add a "PTO Receipt" event and adjust another event to balance the Nomination.
The Dashboard & Search
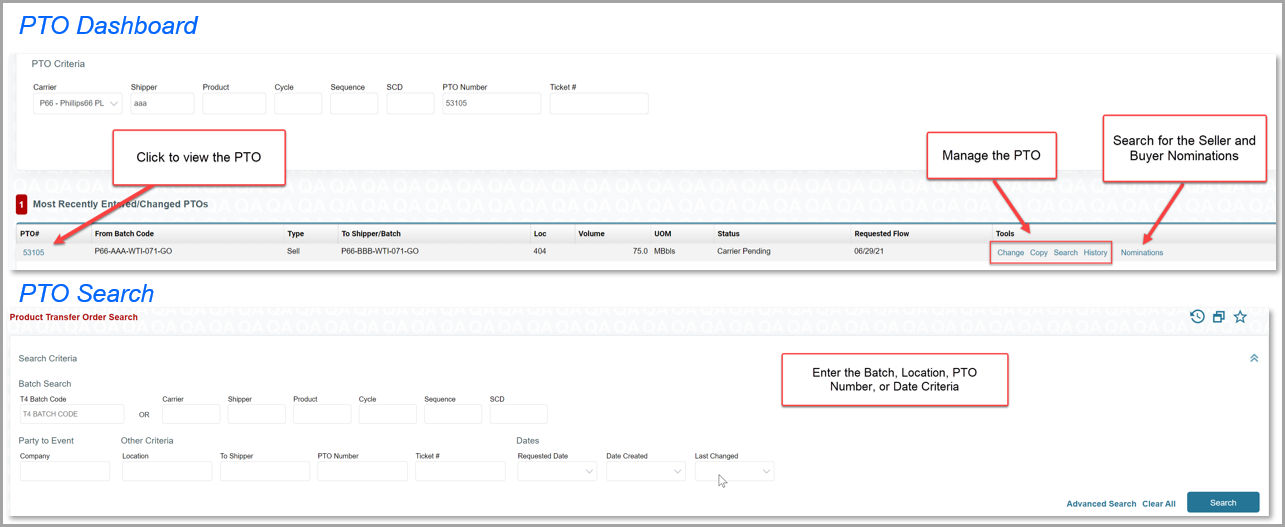
PTO Linked to Nominations
Comments
0 comments
Please sign in to leave a comment.